Connecting Odoo Accounting
Odoo Accounting is connected using an API key you generate inside your Odoo instance. Once connected, invoices posted to your chosen sales journal are automatically synced and fiscalized.
Odoo does not use OAuth for this flow — you create an API key manually, paste it into FiscoBridge, and FiscoBridge uses it to talk to Odoo's JSON-RPC API on your behalf.
Before You Begin
Odoo plan requirement: Odoo's External API requires the Custom plan on Odoo Online. The One App Free and Standard plans do not expose the External API and cannot be connected. If you're on one of those plans, upgrade inside Odoo before starting — self-hosted Odoo has no plan restriction.
You will need:
Admin (or equivalent) access to the Odoo user the integration will run as
The database name of your Odoo instance (only required for self-hosted — on Odoo Online it is derived from your URL automatically)
Your FiscoBridge account with an active integration license and a valid PFX certificate
Step 1 — Generate an API Key in Odoo
Log in to Odoo as the user the integration will run as. Invoices posted in Odoo will appear in FiscoBridge under that user's permissions, so use an account that can read the sales journal you want to fiscalize.
Click your avatar in the top-right and choose My Preferences (on some versions labelled Preferences)
![]()
Open the Account Security tab
Click New API Key
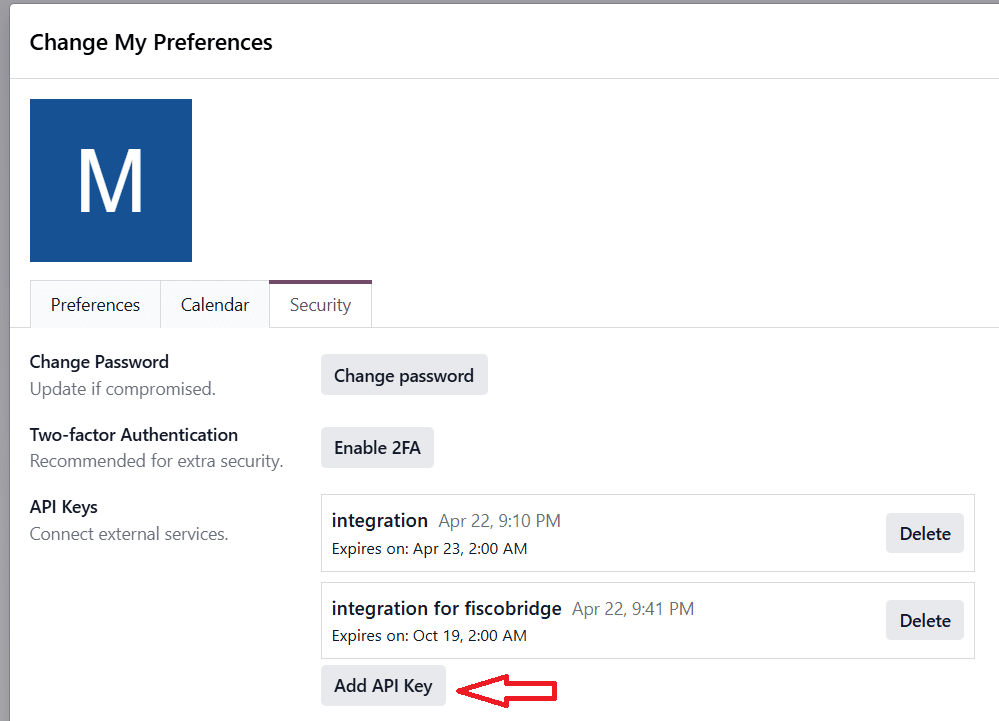
Give the key a description (e.g. "FiscoBridge") and choose a duration
Click Generate Key and copy the key — Odoo shows it only once
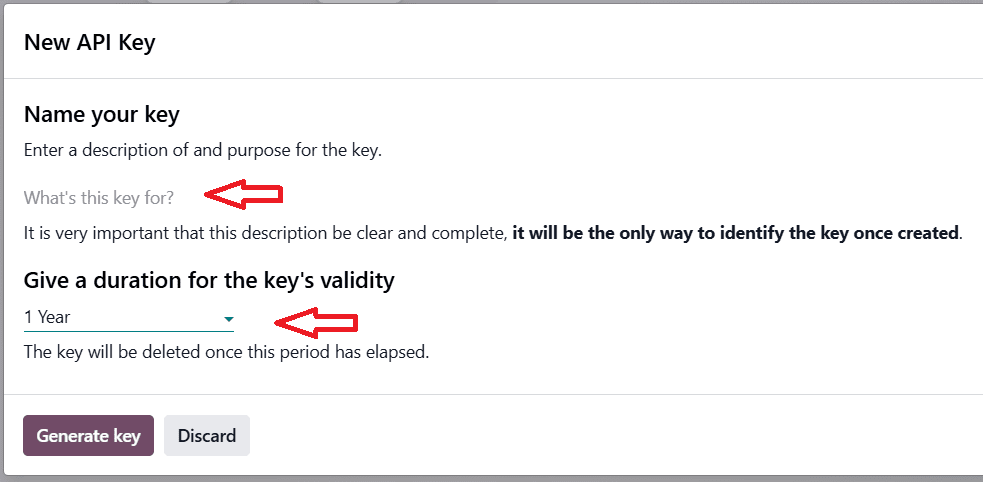
Duration matters. Pick the longest duration your Odoo policy allows — 1 year is recommended where available. When the key expires, sync stops until you generate a new one and update the integration in FiscoBridge, so set a calendar reminder a week before expiry.
Step 2 — Create the Integration in FiscoBridge
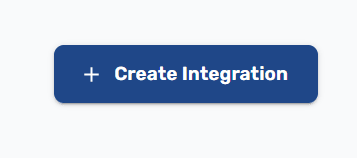
Go to Integrations → Integrations in the sidebar and click Create Integration
On the New Integration page, select the Odoo Accounting card

Pick the tier and subscription to bill the connection against (if you have more than one)
Upload your PFX certificate when prompted
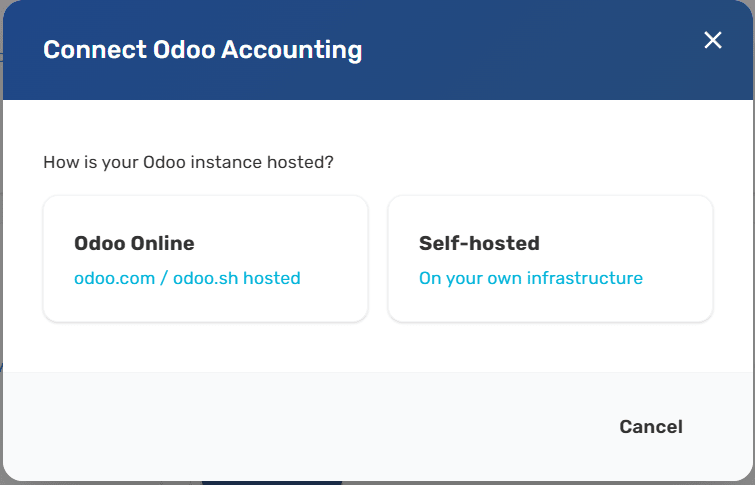
The Odoo configuration dialog opens — choose how your Odoo instance is hosted:
Odoo Online — hosted on
odoo.comorodoo.shSelf-hosted — running on your own infrastructure
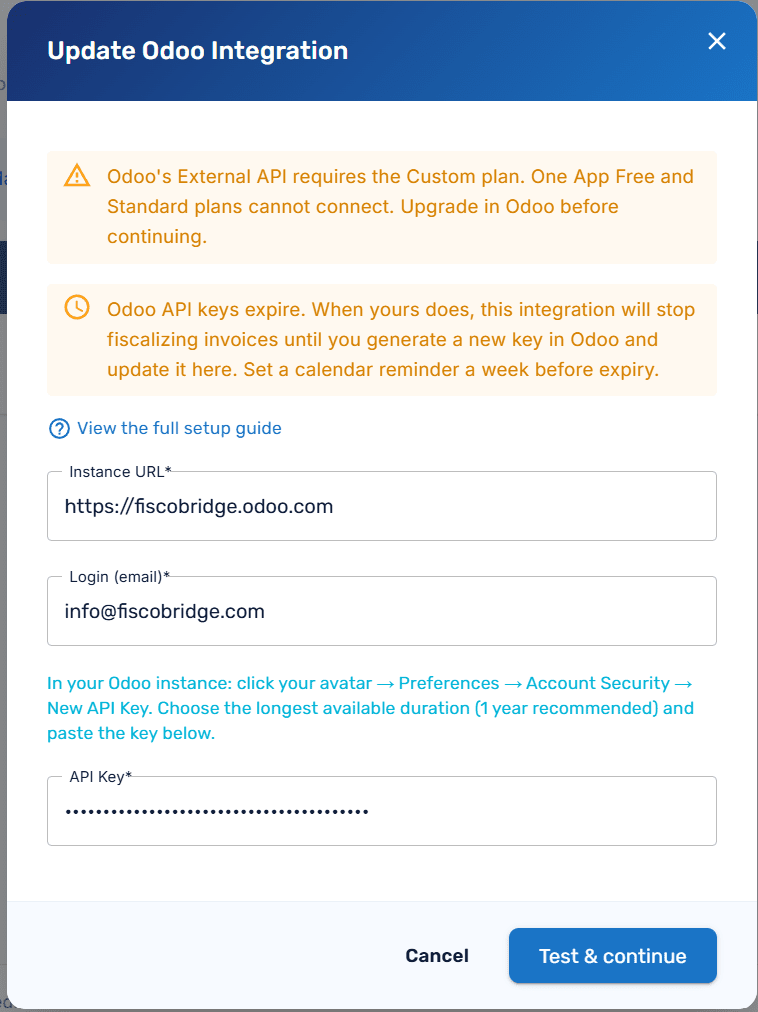
Fill in the connection details:
Field | What to enter |
|---|---|
Instance URL | The full base URL of your Odoo instance, e.g. |
Database (self-hosted only) | The Odoo database the integration should talk to. If your server allows database listing, FiscoBridge fetches the available databases and shows them in a dropdown — pick the right one. If listing is disabled ( |
Login (email) | The email address of the Odoo user whose API key you generated in Step 1. |
API Key | The key you copied from Odoo. Treat it like a password — it's encrypted before storage and never shown back in plain text over the network, but don't share it. |
Click Test & continue. FiscoBridge makes a test call to your Odoo instance to verify the credentials and fetch the list of companies and sales journals.
Step 3 — Select Company and Sales Journal
After the test succeeds, you'll be asked to choose:
Company — for multi-company Odoo setups, the company this integration covers. Create one FiscoBridge integration per company.
Sales Journal — the specific journal whose invoices will be fiscalized. Invoices posted to other journals are ignored.
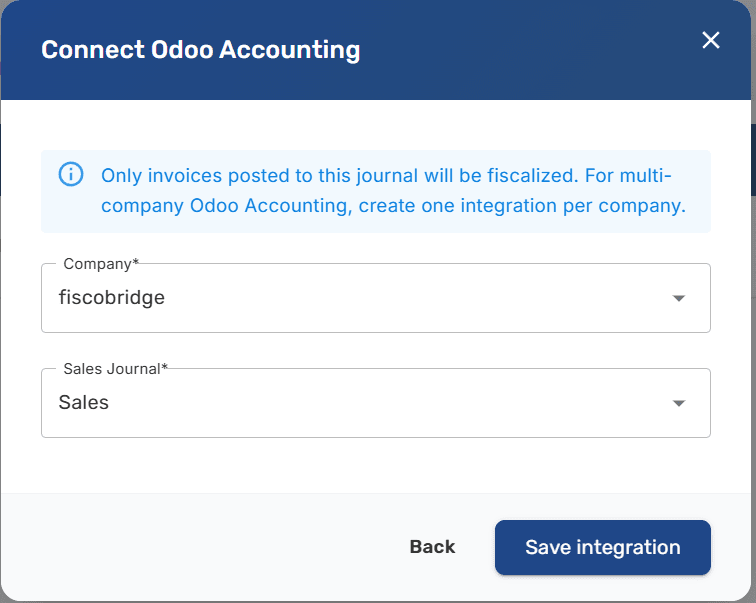
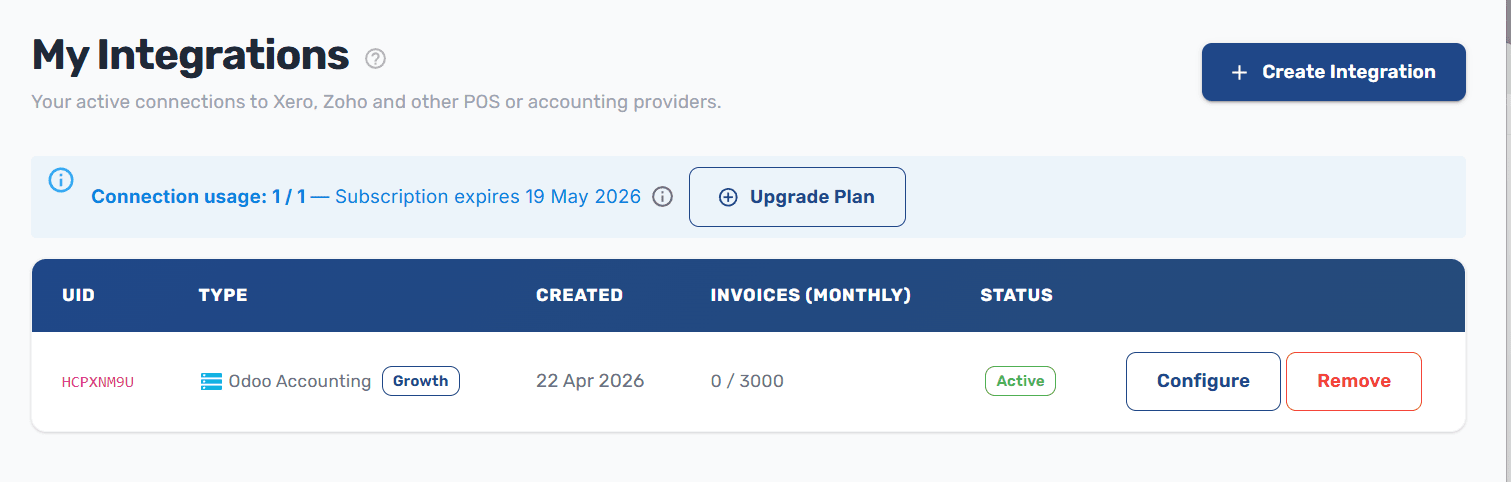
Click Save integration. The connection appears in your integrations list with status Active.
What Gets Synced
Every invoice posted to the selected sales journal (types
out_invoiceandout_refund) is pulled into FiscoBridge automaticallyEach invoice is fiscalized — signed and reported to the tax authority
The fiscal PDF is attached back to the Odoo move, and a chatter note links to the verification URL
If your Odoo has the VSDC custom fields (
x_vsdc_fiscal_number,x_vsdc_verification_url,x_vsdc_signature,x_vsdc_fiscalized_at), they're populated too; otherwise only the attachment and chatter note are written
New invoices are picked up every minute.
Tax Labels
Every invoice FiscoBridge fiscalizes is reported to the tax authority system, which recognises a fixed set of tax labels — single letters such as A, E, F — and ties each one to a rate (for example Fiji's A · 9% VAT, Samoa's A · 15% VAGST, or Vanuatu's V · 15% VAT). Those labels are the only tax categories the tax authority will accept on a fiscal receipt.
When an invoice comes from Odoo, FiscoBridge maps each line's Odoo tax onto one of those tax labels. It does this by name — so your Odoo sales taxes have to carry names that match the tax labels exactly.
Tax labels by country
The labels and rates depend on the country your certificate was issued for:
Fiji
Label | Rate | Name |
|---|---|---|
| 0.00 | ECAL |
| 0.00 | N-TAX |
| 0.50 | PBL |
| 0.00 | STT |
| 9.00 | VAT |
| 0.00 | VAT |
| 15.00 | VAT |
| 12.50 | VAT |
| 0.00 | VAT-EXCL |
Samoa
Label | Rate | Name |
|---|---|---|
| 0.00 | N-TAX |
| 15.00 | VAGST |
| 0.00 | VAGST-EXCL |
| 0.00 | VAGST-EXPO |
Vanuatu
Label | Rate | Name |
|---|---|---|
| 15.00 | VAT |
| 0.00 | VAT-Z |
What FiscoBridge matches on
FiscoBridge reads your active sales taxes (taxes with Tax Type = Sales) and matches on the tax name. For a tax group, the names of its child taxes are matched as well. An Odoo tax maps successfully when its name — or the name of one of its child taxes — is exactly a tax label (e.g. a tax named A). Matching is case-insensitive, but otherwise the name must be the label and nothing else — A matches, VAT A or Standard (A) does not.
Setting it up in Odoo
In Odoo, go to Accounting → Configuration → Taxes
For each tax label you use, open or create a Sales tax
Set its Tax Name to the tax label letter, exactly:
A,E,F, …Set the Amount (percentage) to the rate the tax authority uses for that label (e.g.
9for Fiji'sA · 9%VAT)Save, then assign the tax to the relevant invoice lines
Match the rate, not just the name. The label letter is what links the line to the tax authority's category, but you should also set the tax amount to match the tax authority's rate for that label. If the names line up but the percentages differ, your Odoo totals will no longer reconcile with the fiscal receipt.
Combining two labels on one line
A line can be reported under more than one tax label at once — for example Fiji's A (VAT 9%) and F (ECAL). Either apply both taxes (one named A and one named F) to the line, or create a tax group whose two child taxes are named A and F. The group's own name can be anything (you might call it AF); only the child tax names have to be the label letters. The line is then fiscalized under both A and F.
What happens if a label doesn't match
If any line on an invoice uses a tax that doesn't map to a tax label, the whole invoice is not fiscalized. It is not sent to the tax authority, and no default label is substituted. FiscoBridge records the reason on the invoice — naming the unmapped Odoo taxes, listing the required tax labels, and linking back to this guide — so you can rename the tax in Odoo and re-post the invoice.
Checking the status in FiscoBridge
The Integrations page flags any active Odoo integration whose taxes don't match. When there's a mismatch you'll see a Tax labels warning chip on the integration row and a banner that lists:
Your unmapped Odoo taxes
The required tax labels with their rates (as chips, e.g.
A · 9%)
Once you've renamed the taxes in Odoo, click Re-check on the banner to confirm the mismatch is cleared.
Updating the Configuration
If you need to change the API key (because the old one expired), switch to a different journal, or update any other field:
Go to Integrations → Integrations
Find the Odoo row and click Configure
The dialog opens with your existing settings pre-filled
Change what you need, click Test & continue, then Save changes
The integration keeps its ID, its subscription, and its history of fiscalized invoices. Only the stored configuration is replaced.
Common Errors
"Your Odoo plan does not include External API access. Upgrade to Custom." Your Odoo Online subscription doesn't expose the External API. Upgrade the Odoo subscription to the Custom plan, then retry.
"API key or database name is wrong." Re-paste the API key and confirm it belongs to the user whose email you entered in the Login field. On self-hosted, also double-check the Database value matches the database the user lives in. On Odoo Online there is no database field — the name is taken from your URL, so verify the URL points to the correct tenant.
"Could not reach your Odoo URL." The Instance URL is wrong, your Odoo instance is down, or your self-hosted deployment is not reachable from the public internet. FiscoBridge needs outbound HTTPS access to your Odoo instance.
Invoices stop syncing after a few weeks. Almost always the API key expired. Generate a new one in Odoo (Step 1), then update the integration (see "Updating the Configuration" above).
Removing the Integration
Go to Integrations → Integrations
Click the Remove button next to the Odoo integration
Confirm the removal
Removing the integration stops the sync. Previously fiscalized invoices are not affected. The API key inside Odoo stays active — delete it manually in Odoo if you no longer need it.
Next Steps
Manage integrations — View all your active connections
Integrations Overview — Learn about other supported platforms