
Connecting MYOB
MYOB connects through OAuth, so FiscoBridge links to your MYOB account without you ever sharing your password. Once connected, invoices from your MYOB company file are automatically pulled in, fiscalized (signed and reported to the tax authority), and the fiscal result is written back onto the MYOB invoice.
FiscoBridge supports both MYOB AccountRight and MYOB Business (formerly Essentials).
Setting Up the Connection
Go to Integrations → Integrations in the sidebar
Click Create Integration
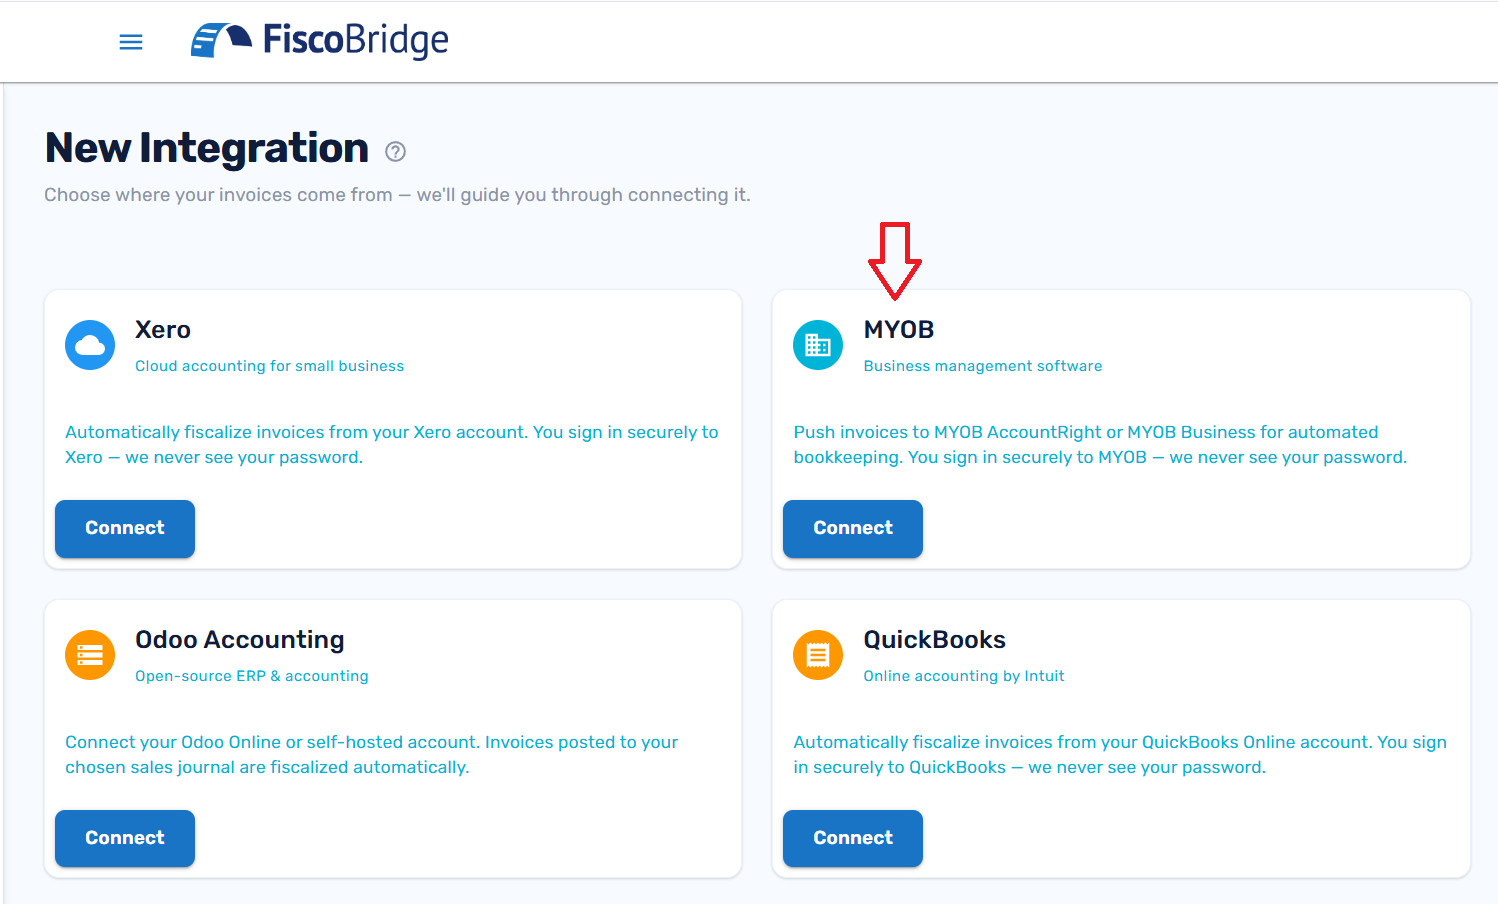
On the New Integration page, select the MYOB card
If you have more than one integration license, choose which one to use for this connection
An Upload Certificate dialog opens — select your PFX certificate file and enter its password, then click Upload
The Connect MYOB dialog opens. Confirm the certificate summary, then choose:
MYOB product — whether your company file is AccountRight (v2) or MYOB Business (see Choosing your MYOB product)
Fiscalize invoice — when each invoice should be fiscalized (see Fiscalization Trigger)
Training mode — leave off for live fiscal receipts, or turn on to send test (Training) invoices
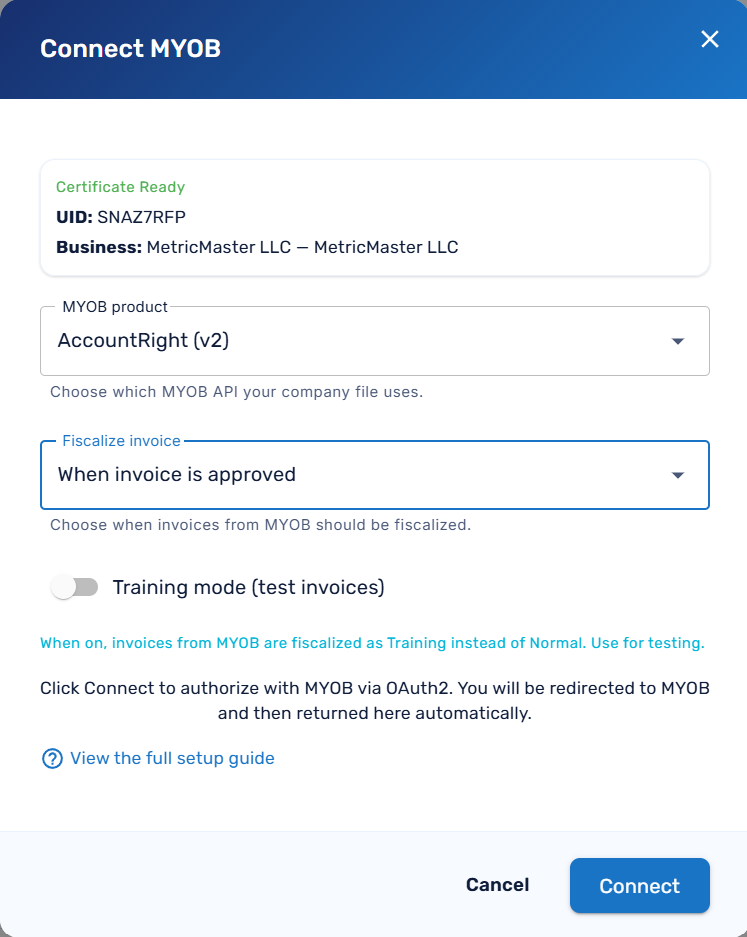
Click Connect — you'll be redirected to MYOB to sign in
Sign in to MYOB, authorize FiscoBridge, and select the company file you want to connect
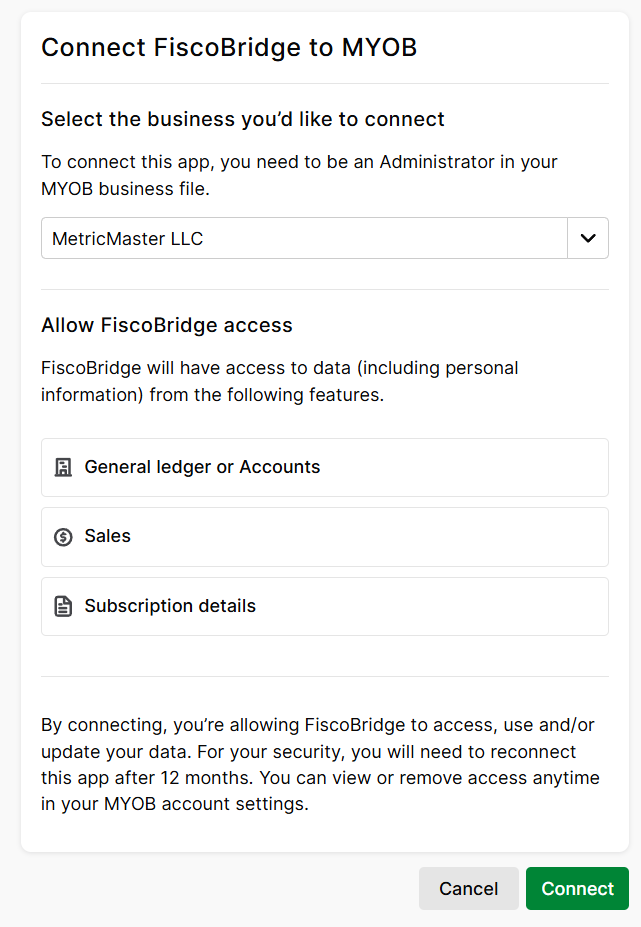
You'll be redirected back to the Client Portal
Once authorized, the MYOB integration appears in your integrations list with status Active.

Important: Before any invoice can be fiscalized, you also need to map your MYOB tax codes to fiscal tax labels — see Mapping Tax Labels below.
Choosing your MYOB product
FiscoBridge talks to two different MYOB APIs, so pick the one that matches your company file:
AccountRight (v2) — MYOB AccountRight company files (desktop files hosted in the cloud, or the AccountRight app)
MYOB Business — MYOB Business (formerly Essentials) online company files
If you're not sure which you have, check how you normally sign in to MYOB, or ask whoever set up your MYOB account. You can change this later by reconnecting the integration.
Fiscalization Trigger
When you connect MYOB, you decide at what point each invoice should be fiscalized. FiscoBridge checks your company file for new and updated invoices every few minutes and fiscalizes the ones that match your chosen trigger.
When payment is added (default)
The invoice is fiscalized once it's fully paid in MYOB (its status becomes Closed).
Best when you want the fiscal receipt to reflect the moment of payment
An invoice that's only part-paid stays open and is not sent to the tax authority until it's settled
When invoice is approved
The invoice is fiscalized as soon as it's recorded in MYOB (its status is Open), regardless of whether it's been paid.
Best when you issue the fiscal receipt at the moment of sale
Useful for credit sales where the customer pays later but the invoice is finalized immediately
Note: To change the trigger later, open the integration's Settings (see Changing Settings) — you don't need to reconnect.
Mapping Tax Labels
Every invoice FiscoBridge fiscalizes is reported to the tax authority system, which recognises a fixed set of tax labels — single letters such as A, E, F — and ties each one to a rate (for example Fiji's A · 9% VAT, Samoa's A · 15% VAGST, or Vanuatu's V · 15% VAT). Those labels are the only tax categories the tax authority will accept on a fiscal receipt.
MYOB has its own tax codes (such as GST, FRE, N-T). FiscoBridge doesn't guess how those relate to the tax authority's labels — instead, you map them yourself, once, and FiscoBridge remembers the mapping for every invoice that comes through.
How mapping works
Connect the MYOB integration (above). FiscoBridge reads the tax codes that exist in your company file
On the Integrations page, open the integration's menu and choose Configure tax labels (or click Configure tax labels on the warning banner)
The MYOB tax labels dialog lists every MYOB tax code with its rate. For each one, pick one or more fiscal tax labels from the dropdown
Click Save
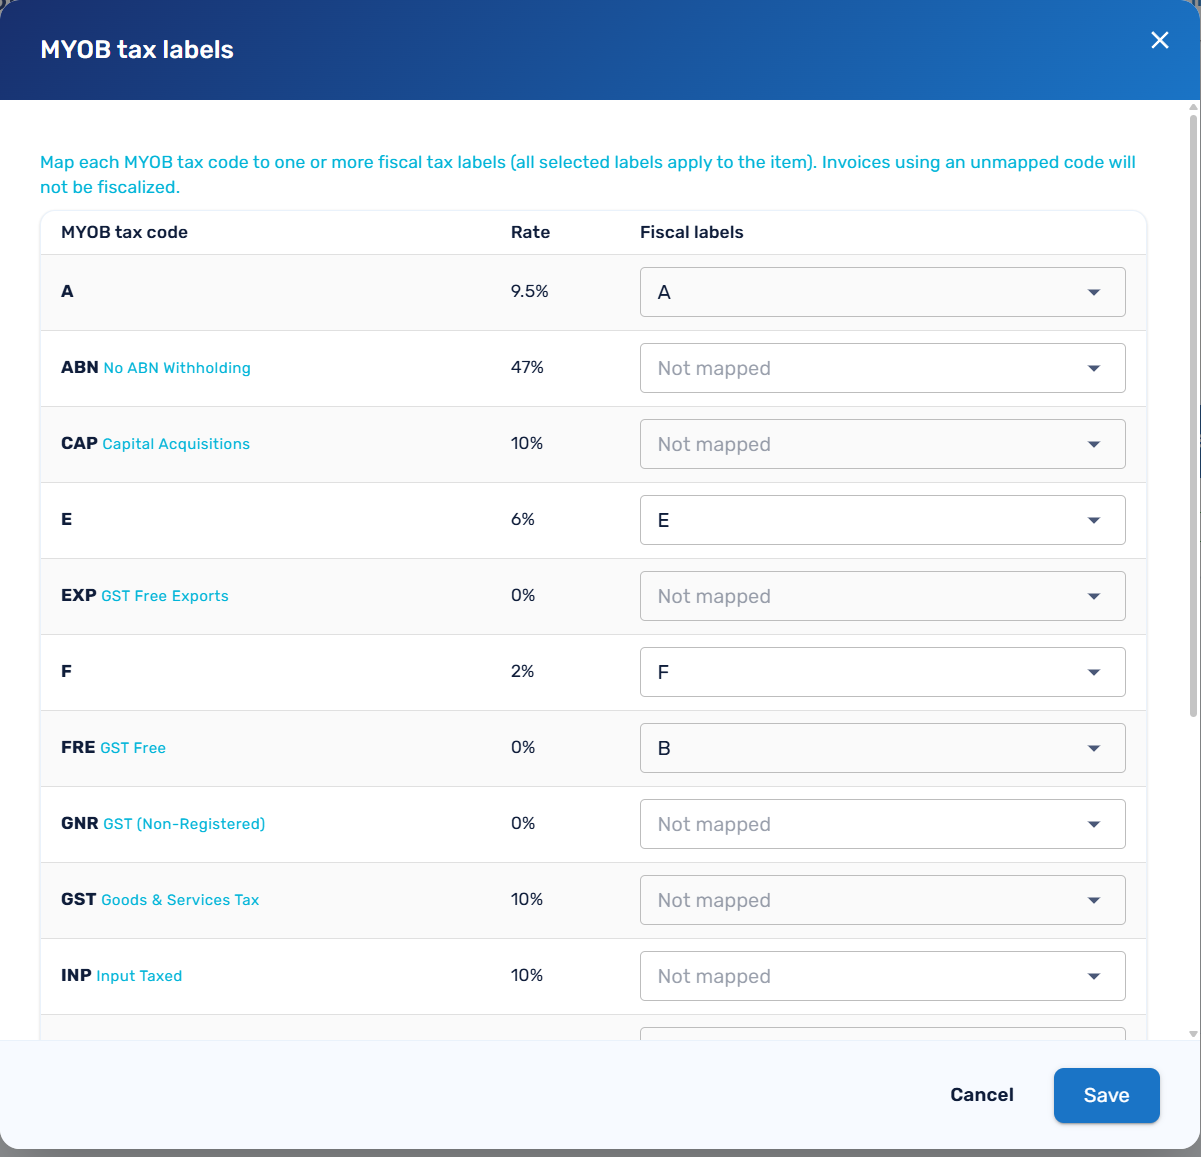
A tax code can map to more than one label when a line has to be reported under several categories at once (for example Fiji's A VAT and F ECAL). Every selected label is applied to that line.
Map each MYOB tax code to the label whose rate matches it, using the tables below.
Tax labels by country
The labels and rates depend on the country your certificate was issued for:
Fiji
Label | Rate | Name |
|---|---|---|
| 0.00 | ECAL |
| 0.00 | N-TAX |
| 0.50 | PBL |
| 0.00 | STT |
| 9.00 | VAT |
| 0.00 | VAT |
| 15.00 | VAT |
| 12.50 | VAT |
| 0.00 | VAT-EXCL |
Samoa
Label | Rate | Name |
|---|---|---|
| 0.00 | N-TAX |
| 15.00 | VAGST |
| 0.00 | VAGST-EXCL |
| 0.00 | VAGST-EXPO |
Vanuatu
Label | Rate | Name |
|---|---|---|
| 15.00 | VAT |
| 0.00 | VAT-Z |
What happens if a code isn't mapped
If an invoice line uses a MYOB tax code you haven't mapped, that invoice can't be fiscalized. FiscoBridge retries it a few times and then marks it failed, and writes the reason back onto the MYOB invoice (see What gets written back to MYOB). Map the missing tax code, then re-save the invoice in MYOB so it's picked up again on the next sync.
Header and subtotal lines on a MYOB invoice are ignored — they carry no tax code and are never sent to the tax authority. Only transaction lines are fiscalized.
Checking the status in FiscoBridge
The Integrations page flags any MYOB integration that still has unmapped tax codes. You'll see a warning banner telling you how many tax codes need mapping — and that invoices using them won't be fiscalized — with a Configure tax labels button to fix it.

What Gets Synced
Invoices from MYOB (both Item and Service invoices) are automatically pulled into FiscoBridge based on your fiscalization trigger
Each invoice is fiscalized — signed and reported to the tax authority
If you change an invoice in MYOB after it's been fiscalized, FiscoBridge detects the change and fiscalizes the updated invoice
What gets written back to MYOB
After an invoice is fiscalized, FiscoBridge writes the fiscal result back onto the MYOB invoice so your records stay in one place:
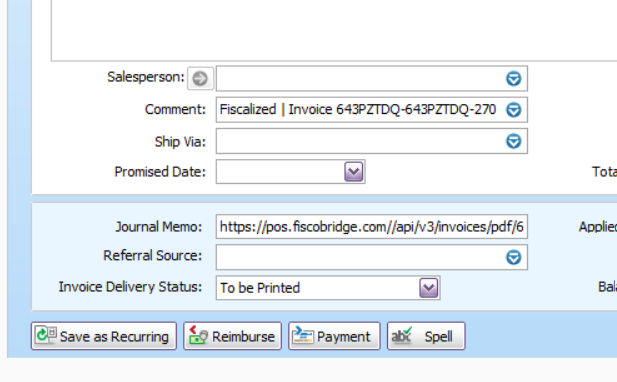
The invoice Comment field gets a
[Fisco] … [/Fisco]block containing the fiscal receipt number and a verification link — for example[Fisco] Fiscalized | <receipt number> | Verify: <url> [/Fisco]The Journal Memo is set to the FiscoBridge link for the receipt
If fiscalization fails — for example because of an unmapped tax code — FiscoBridge instead writes a [Fisco] FAILED | <reason> [/Fisco] note onto the invoice, so you can see what went wrong directly in MYOB.
Changing Settings
To change the fiscalization trigger or training mode after connecting:
Go to Integrations → Integrations
Open the MYOB integration's menu and choose Settings
Adjust Fiscalize invoice and/or Training mode, then click Save changes
To switch between AccountRight and MYOB Business, use Reconnect instead — the product is chosen during the connection step.
Reconnecting
If the connection expires or is interrupted:
Go to Integrations → Integrations
Find your MYOB integration in the list
Click the Reconnect button
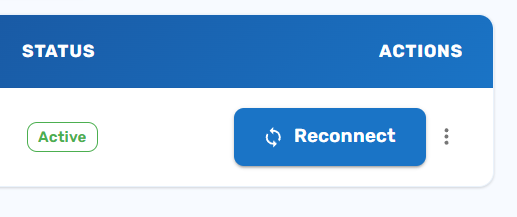
The Connect MYOB dialog reopens with your current product, trigger, and training-mode settings pre-filled. Adjust them if needed, then complete the MYOB authorization again
Note: MYOB OAuth tokens expire periodically; FiscoBridge refreshes them automatically while the integration is active. If you see the integration marked inactive, or it stops picking up invoices, reconnecting restores the sync. You'll also need to reconnect if you want to point it at a different company file.
Removing the Integration
Go to Integrations → Integrations
Click the Remove button next to the MYOB integration
Confirm the removal
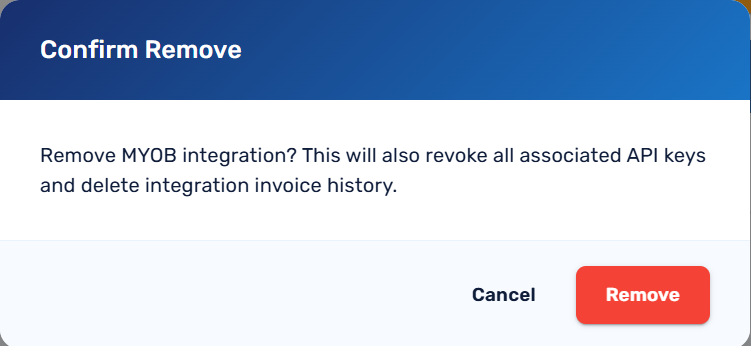
Removing the integration stops the sync. Previously fiscalized invoices are not affected.
Troubleshooting
Invoices not syncing?
Check that the integration status is Active — reconnect if it shows as inactive
Make sure every MYOB tax code you use is mapped to a tax label (look for the warning banner on the Integrations page)
Confirm you selected the correct MYOB product (AccountRight vs MYOB Business) for your company file — reconnect to change it
Make sure your integration license is active and hasn't exceeded its invoice limit
New and changed invoices are picked up every few minutes, not instantly — allow a little time
An invoice shows a [Fisco] FAILED note?
The note explains why. The most common cause is an unmapped tax code — map it, then re-save the invoice in MYOB so it's processed again
Wrong company file?
Reconnect the integration and select the correct company file during the MYOB authorization step
Next Steps
Manage integrations — View all your active connections
Integrations Overview — Learn about other supported platforms