Connecting Xero
Xero is connected through OAuth, which means FiscoBridge securely links to your Xero account without you needing to share passwords. Once connected, your Xero invoices are automatically synced and fiscalized.
Setting Up the Connection
Go to Integrations → Integrations in the sidebar
Click Create Integration
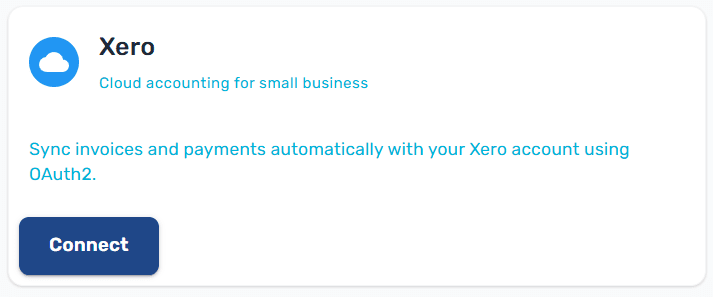
On the New Integration page, select the Xero card
An Upload Certificate dialog opens — select your PFX certificate file and enter its password, then click Upload
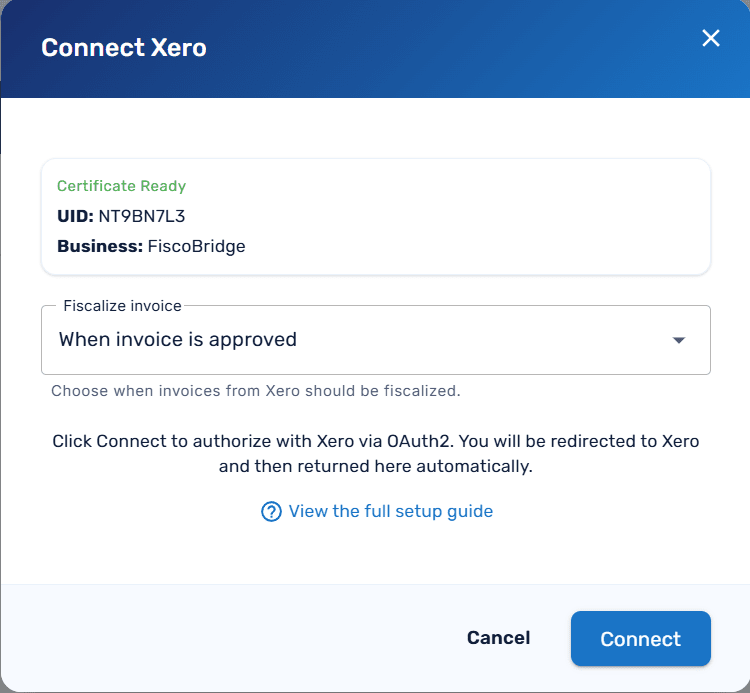
After the certificate is uploaded, the Connect Xero dialog opens. Choose when invoices from Xero should be fiscalized (see Fiscalization Trigger below), then click Connect

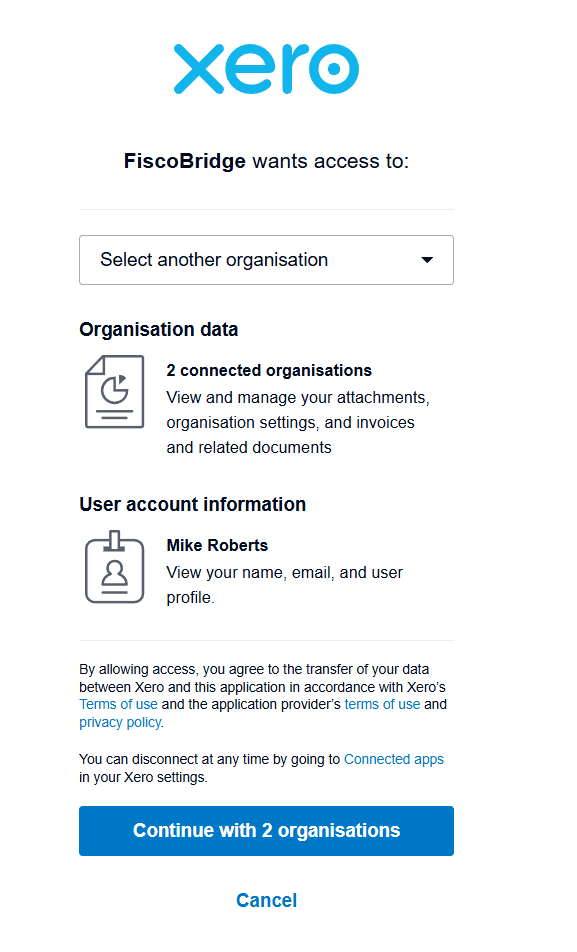
You'll be redirected to Xero's authorization page
Log in to your Xero account (if not already logged in)
Select the Xero organization you want to connect
Click Allow Access
You'll be redirected back to the Client Portal
Once authorized, the Xero integration appears in your integrations list with status Active.

Fiscalization Trigger
When you connect Xero, you decide at what point each invoice should be fiscalized. There are two options:
When payment is added (default)
The invoice is fiscalized as soon as a payment is recorded against it in Xero.
Best when you want the fiscal receipt to reflect the moment of payment
Works well for businesses that mark invoices as paid in Xero at the time of sale
Unpaid invoices stay in Xero without being sent to the tax authority
When invoice is approved
The invoice is fiscalized as soon as it moves from Draft to Awaiting Payment (approved) in Xero.
Best when you issue the fiscal receipt at the moment of sale, regardless of payment status
Useful for credit sales where the customer pays later but the invoice is finalized immediately
Each approved Xero invoice triggers fiscalization, even if no payment has been recorded yet
You can keep an invoice in Draft and edit it as many times as needed — fiscalization only happens once you approve it
Note: To change the trigger later, click Reconnect on the Xero integration and pick the other option in the Connect Xero dialog.
What Gets Synced
Invoices from Xero are automatically pulled into FiscoBridge
Each invoice is fiscalized (signed and reported to the tax authority)
Fiscal status is linked back — you can view the Xero invoice directly from the POS Invoices page
Tax Labels
Every invoice FiscoBridge fiscalizes is reported to the tax authority system, which recognises a fixed set of tax labels — single letters such as A, E, F — and ties each one to a rate (for example Fiji's A · 9% VAT, Samoa's A · 15% VAGST, or Vanuatu's V · 15% VAT). Those labels are the only tax categories the tax authority will accept on a fiscal receipt.
When an invoice comes from Xero, FiscoBridge maps each line's Xero tax rate onto one of those tax labels. It does this by name — so your Xero tax rates have to carry names that match the tax labels exactly.
Automatic setup when you connect
You usually don't have to create these tax rates yourself. Every time you connect or reconnect a Xero integration, FiscoBridge looks at the tax labels required for your certificate's country, checks which ones are missing from your Xero organization, and creates the missing ones for you automatically — right after you authorize the connection.
For each missing label it adds a new Xero tax rate with:
a tax component named exactly after the label letter (e.g.
A), so it maps straight away, andthe percentage the tax authority uses for that label
The rate is given a readable display name (such as VAT or VAGST, falling back to something like A (9%)). FiscoBridge only adds missing rates — it never edits or deletes tax rates you already have, and any rate whose component already matches a label is left untouched.
This is best-effort: if a rate can't be created — for example, if the connected Xero user doesn't have permission to manage tax rates — FiscoBridge skips it and flags the remaining mismatch so you can add it by hand (see What happens if a label doesn't match). Reconnecting retries the creation for any labels that are still missing. Once the rates exist, you still need to assign them to the relevant line items on your invoices.
Tax labels by country
The labels and rates depend on the country your certificate was issued for:
Fiji
Label | Rate | Name |
|---|---|---|
| 0.00 | ECAL |
| 0.00 | N-TAX |
| 0.50 | PBL |
| 0.00 | STT |
| 9.00 | VAT |
| 0.00 | VAT |
| 15.00 | VAT |
| 12.50 | VAT |
| 0.00 | VAT-EXCL |
Samoa
Label | Rate | Name |
|---|---|---|
| 0.00 | N-TAX |
| 15.00 | VAGST |
| 0.00 | VAGST-EXCL |
| 0.00 | VAGST-EXPO |
Vanuatu
Label | Rate | Name |
|---|---|---|
| 15.00 | VAT |
| 0.00 | VAT-Z |
What FiscoBridge matches on
Each Xero tax rate is made up of one or more tax rate components (the named percentage lines inside a tax rate). FiscoBridge looks at the component name, not the tax rate's display name. A component maps successfully when it is named exactly like a tax label (e.g. a component named A). Matching is case-insensitive, but otherwise the name must be the label and nothing else — A matches, VAT A or Standard (A) does not.
Setting it up manually in Xero
If you'd rather set the rates up yourself — or you need to add one that couldn't be created automatically:
In Xero, go to Accounting → Advanced → Tax rates
Add or edit a tax rate for each tax label you use
Give the tax rate any display name you like (e.g. Standard Rate), then set its tax component:
Component name — the tax label letter, exactly:
A,E,F, …Percentage — the rate the tax authority uses for that label (e.g.
9for Fiji'sA · 9%VAT)
Save the tax rate, then assign it to the relevant line items on your invoices
Match the rate, not just the name. The label letter is what links the line to the tax authority's category, but you should also set the component percentage to match the tax authority's rate for that label. If the names line up but the percentages differ, your Xero totals will no longer reconcile with the fiscal receipt.
Only tax rates that can apply to revenue (sales) are considered — purchase-only rates are ignored.
Combining two labels on one line
A single Xero tax rate can carry more than one tax label — useful when a line has to be reported under two categories at once, for example Fiji's A (VAT 9%) and F (ECAL). Create one tax rate with two components, name one component A and the other F, and set each component's percentage to its label's rate. The tax rate's display name can be anything (you might call it AF); only the component names have to be the label letters. The line is then fiscalized under both A and F.
What happens if a label doesn't match
If any line on an invoice uses a tax rate that doesn't map to a tax label, the whole invoice is not fiscalized. It is not sent to the tax authority, and no default label is substituted. FiscoBridge records the reason on the invoice — naming the unmapped Xero tax rates, listing the required tax labels, and linking back to this guide — so you can fix the tax rate in Xero and re-approve the invoice.
Checking the status in FiscoBridge
The Integrations page flags any active Xero integration whose tax rates don't match. When there's a mismatch you'll see a Tax labels warning chip on the integration row and a banner that lists:
Your unmapped Xero tax rates
The required tax labels with their rates (as chips, e.g.
A · 9%)
Once you've renamed the components in Xero, click Re-check on the banner to confirm the mismatch is cleared.
Reconnecting
If the connection expires or is interrupted:
Go to Integrations → Integrations
Find your Xero integration in the list
Click the Reconnect button

Complete the Xero authorization again
Note: Xero OAuth tokens expire periodically. If you see your integration marked as inactive, reconnecting will restore the sync.
Reconnecting also re-runs the automatic tax rate setup, so any tax labels still missing from your Xero organization are created again on reconnect.
Viewing Synced Invoices
Invoices synced from Xero appear in POS → POS Invoices. Each synced invoice includes a View in Xero link in its details dialog, taking you directly to the invoice in your Xero account.
Removing the Integration
Go to Integrations → Integrations
Click the Remove button next to the Xero integration
Confirm the removal
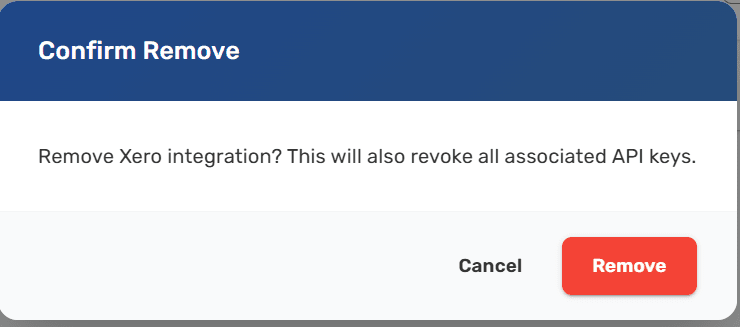
Removing the integration stops the sync. Previously fiscalized invoices are not affected.
Troubleshooting
Invoices not syncing?
Check that the integration status is Active
Try reconnecting if the status shows as inactive
Make sure your integration license is active and hasn't exceeded its invoice limit
Wrong Xero organization?
Remove the current integration and create a new one, selecting the correct organization during the Xero authorization step
Next Steps
Manage integrations — View all your active connections
Integrations Overview — Learn about other supported platforms