Requesting a Digital Certificate
Before you can connect an integration or use Web Invoicing, you need a digital fiscal certificate — a .pfx file issued by your tax authority. You request it from your country's taxpayer admin portal, and this guide walks you through every step.
Before You Start
You request your certificate from the Taxpayer Administration Portal (TAP) for your country:
Fiji — tap.vms.frcs.org.fj
Samoa — tap.tims.revenue.gov.ws
Vanuatu — tap.vsms.gov.vu
You'll need your taxpayer login details for the portal.
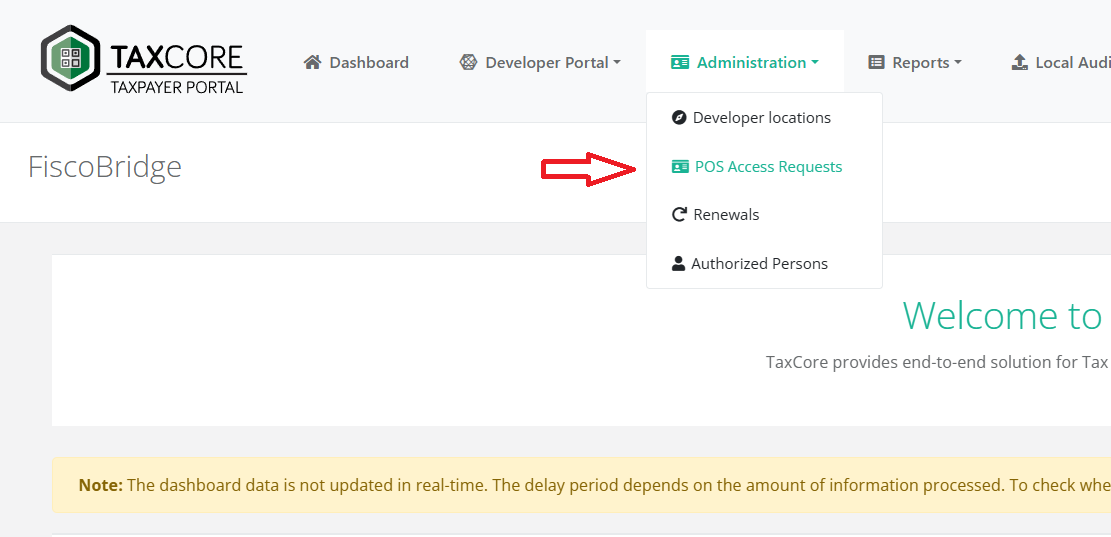
Step 1 — Open POS Access Requests
Log in to your country's taxpayer admin portal using the link above.
Open the Administration menu and choose POS Access Requests.
Step 2 — Request Additional Certificates
On the administration page, click Request Additional Certificates.

Step 3 — Add Your Certificate File
You're now on the Request POS access certificates page.
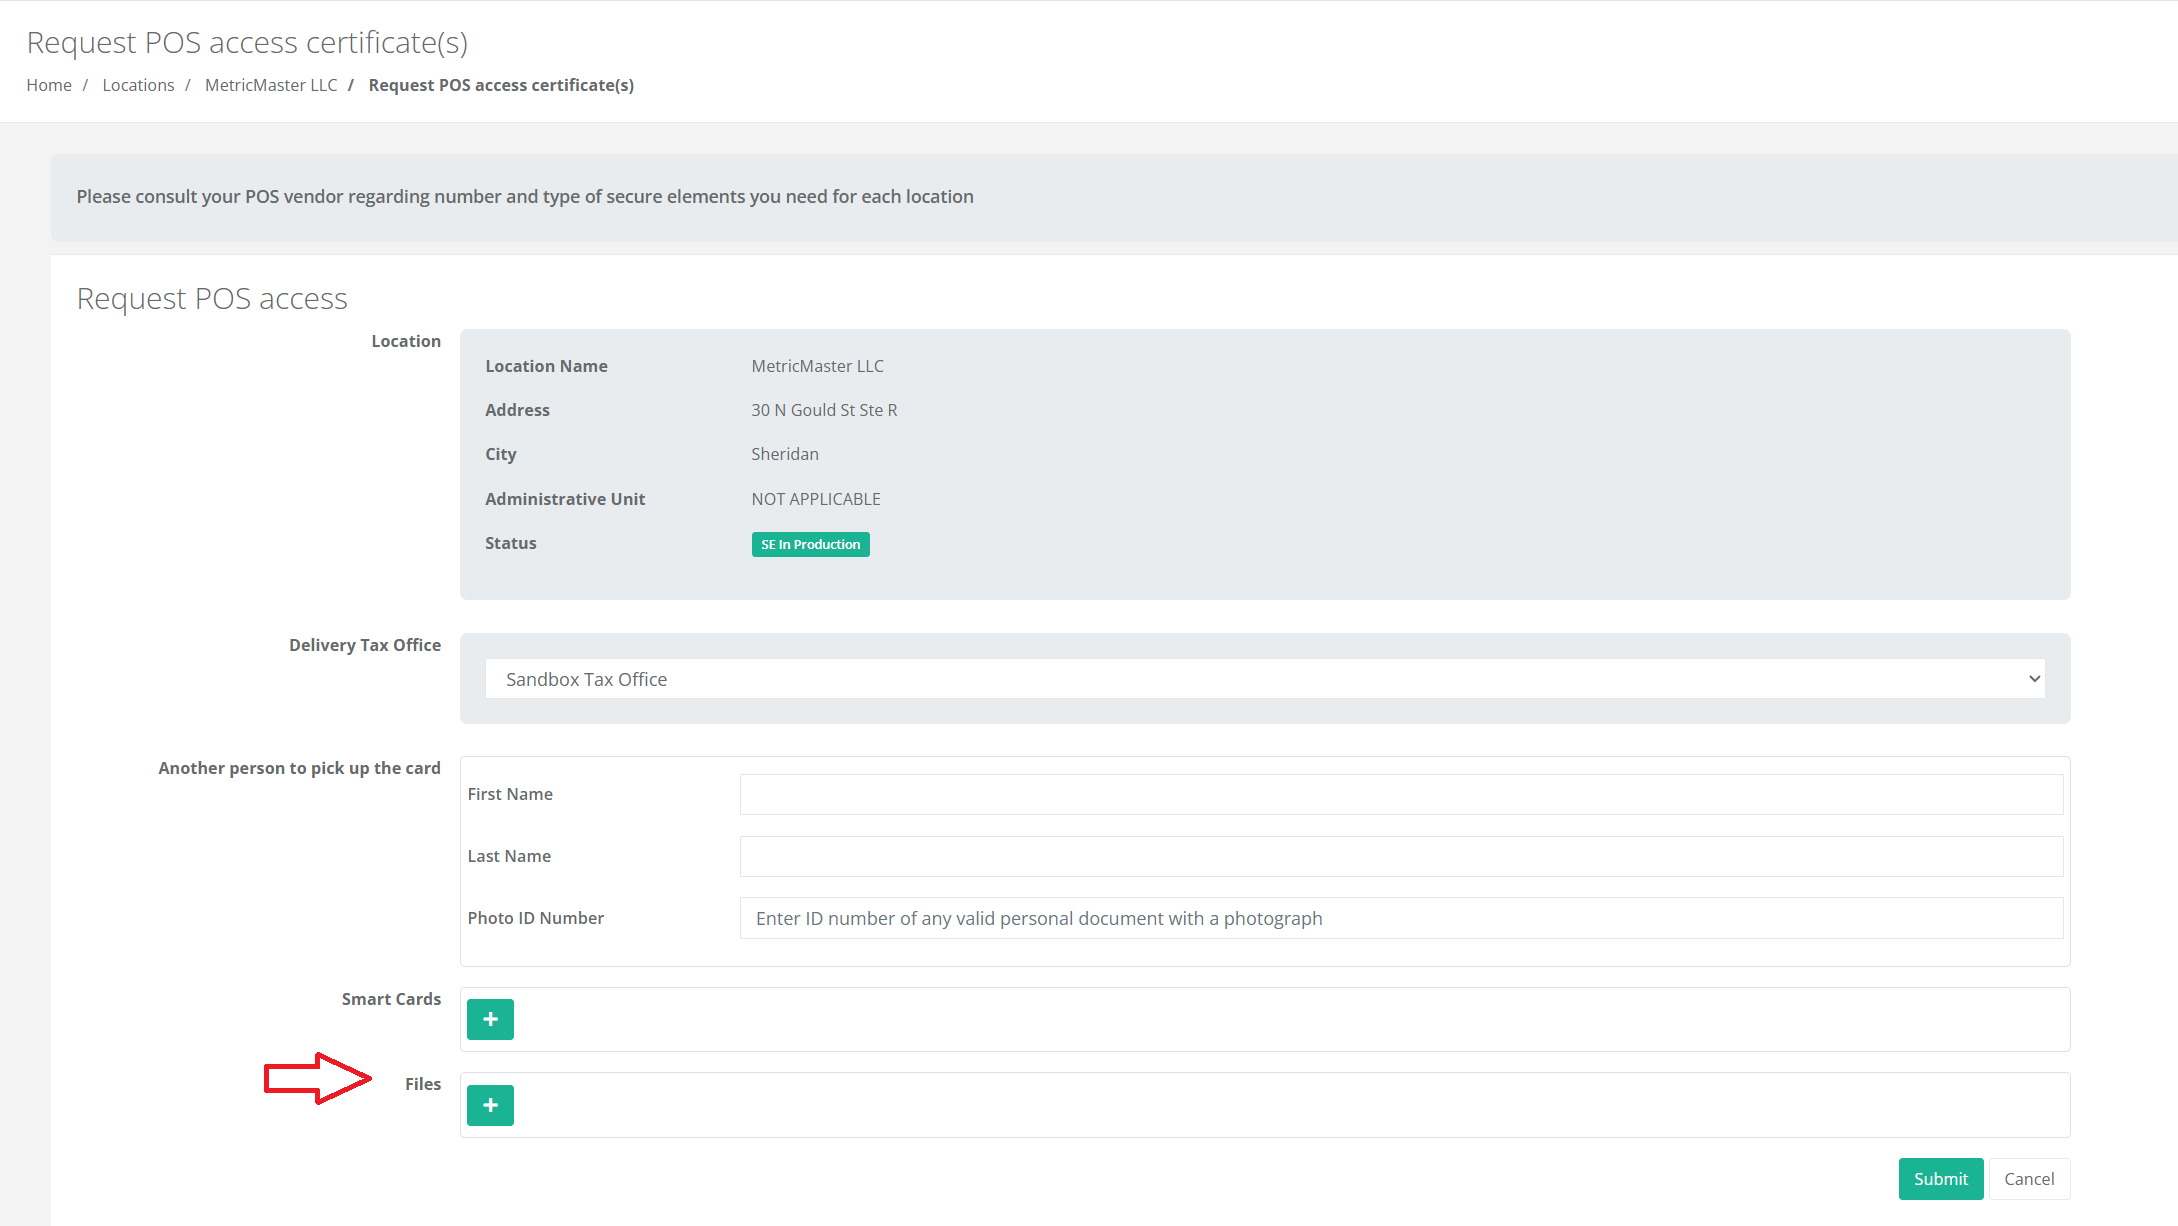
In the Files section, click the plus (+) icon to add a new certificate.
Set a password for the certificate.
Enter your PAC for the certificate.

Important: Write down the password and PAC exactly as you set them here. FiscoBridge asks for both when you add the certificate, and they cannot be recovered if lost.
Click Submit to send your request.
What Happens Next
Once your tax authority approves the request, you'll receive an email containing a link to your new certificate. Download the file from that link and unzip it to get your .pfx certificate. With the .pfx file, its password, and your PAC in hand, you're ready to add it in FiscoBridge.
Next Steps
Buy a license for Web Invoicing or Integrations
Navigate the portal to find where to add your certificate