
Cashiers & Roles
Staff sign in to Desktop POS with a PIN on a numeric keypad, and each account is assigned a role that controls what they can do. This page explains how to create cashier accounts, what each role permits, and how manager authorization works.
Signing In
When Desktop POS is idle or locked it shows the cashier selection screen.
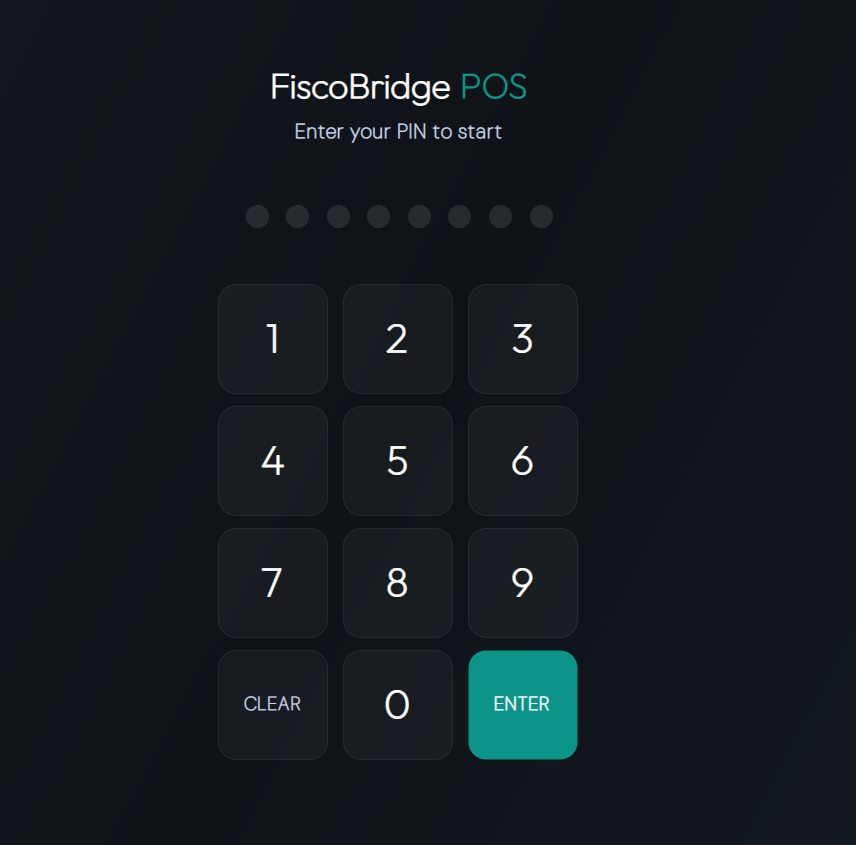
Select your name from the cashier list (or the app may jump straight to the PIN pad if only one cashier exists).
Enter your PIN on the keypad — digits are masked as you type.
Press Enter (or the confirm key) — if the PIN matches, the app opens to the sales screen.
Incorrect PINs are rejected immediately; after several failed attempts the account is briefly locked.
Cashier Accounts
To view and manage cashiers, go to Settings → Cashiers.
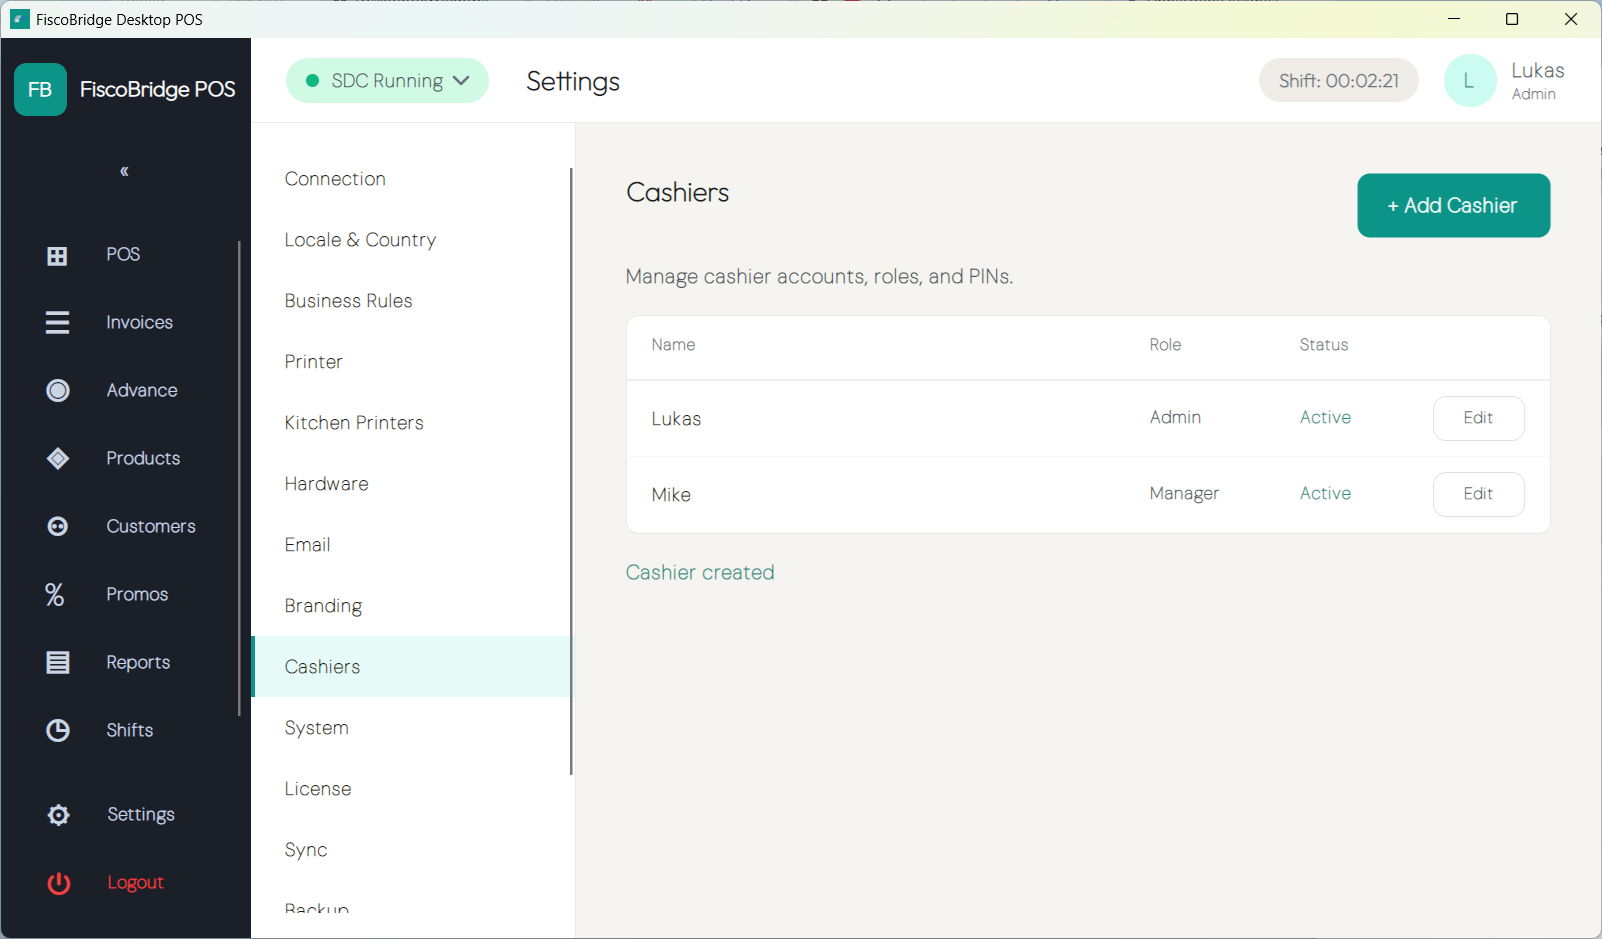
Each cashier account has the following fields:
Field | Description |
|---|---|
Name | Display name shown on the login screen and on receipts |
PIN | 4–8 digit numeric PIN used to sign in |
Role | Manager or Cashier (see below) |
Active | Inactive accounts are hidden from the login screen |
To add a cashier:
Click Add cashier.
Enter the Name, PIN, and Role.
Click Save.
To edit an existing cashier, tap their name in the list and update any field.
Roles
Role | Permissions |
|---|---|
Manager | All operations — selling, discounts, cash in/out, shift open/close, refunds, cancellations, layout editing, settings access, and all manager-only actions |
Cashier | Standard selling only — adding items to a sale, selecting payment methods, and fiscalizing; no access to manager-only actions |
A device must have at least one Manager-role account at all times.
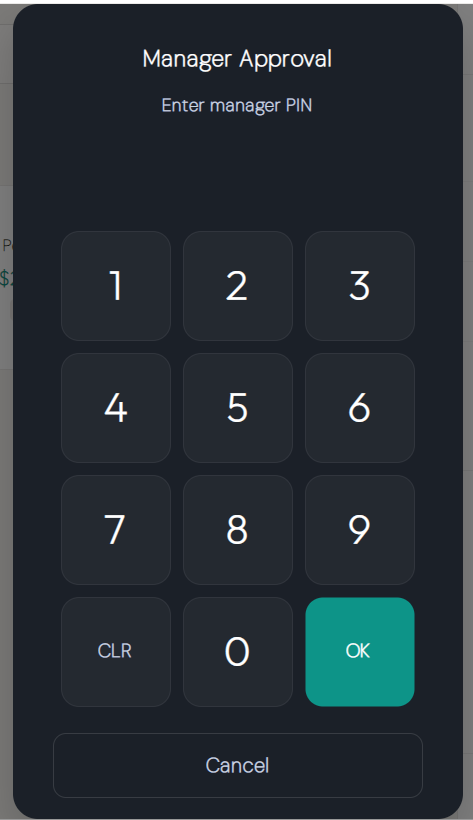
Note: Manager-only actions can be authorized without signing out. When a Cashier triggers a protected action, the app prompts for a manager PIN inline — the signed-in cashier does not change.
Manager PIN
Certain actions require manager authorization regardless of who is currently signed in:
Applying a manual discount (line-level or cart-level)
Cash in / cash out
Opening and closing a shift (Z-report)
Issuing a refund
Cancelling a fiscal invoice
Editing the product layout
When one of these actions is attempted, a Manager PIN dialog appears. A manager enters their PIN to authorize the single action — the cashier session continues unchanged after authorization.
Changing Your PIN
Any cashier can change their own PIN:
Sign in with your current PIN.
Tap your name or the profile icon in the top corner.
Select Change PIN.
Enter your current PIN, then enter and confirm your new PIN (4–8 digits).
Click Save.
A Manager can also reset another cashier's PIN from Settings → Cashiers without needing the old PIN.
Next Steps
Make a sale — Ring up a transaction from start to finish
Daily report — Open and close a shift and review daily totals
Settings — Full configuration reference